

Custom Chocolate Machine Buying Guide and Expert Tips for Artisan Makers
2026-11-18
Most custom chocolate machine guides read like spec sheets—this one won’t. If you’re an artisan maker tired of wrestling with equipment that overheats small batches or ignores your texture targets, the next few minutes will save you from costly trial and error. You’ll get straight answers on what to inspect, which upgrades matter, and where GUSU fits into a production setup that still respects craft.
Size It for the Chocolate You Actually Make, Not the Chocolate You Hope to Sell
Most tempering machines are sized by the batch you dream of selling, not the batch you actually stir at 2 a.m. on a Tuesday. You buy the 24-kilo tank because a distributor once said “we’ll need volume,” then spend every production run scraping a thin puddle of chocolate across the bottom while the auger spins air. Size it for the countertop you stand at, the molds you already own, and the cooling rack that’s never empty. If your largest real order is eleven bars, a machine that comfortably handles six kilos will save you more money than the unused capacity on a twenty-kilo beast.
Start with your busiest single day from the last three months, not a forecast. Count the actual kilos that went through the melter, including the batch you overcooked and threw back in. That number, plus a fifteen percent buffer for the odd holiday rush, is your sizing target. Machines perform best between sixty and eighty percent of their stated capacity; below that, chocolate crystallizes unevenly, and above it you’re babysitting a motor that’s begging for a break. If your notes say “made nine kilos on December 16th,” you need a twelve-kilo working capacity, not a thirty-kilo showpiece.
Small and consistent beats large and aspirational every time. A compact tempering unit that finishes a batch and idles quietly while you unmold is more profitable than a floor-standing model that forces you to produce excess inventory just to justify its footprint. Chocolate you actually make respects the rhythm of your kitchen. Buy the machine that fits that rhythm today, and when the orders genuinely double, you can add a second unit without rewriting your workflow.
Look Past the Shiny Panels and Into the Tempering Mechanics
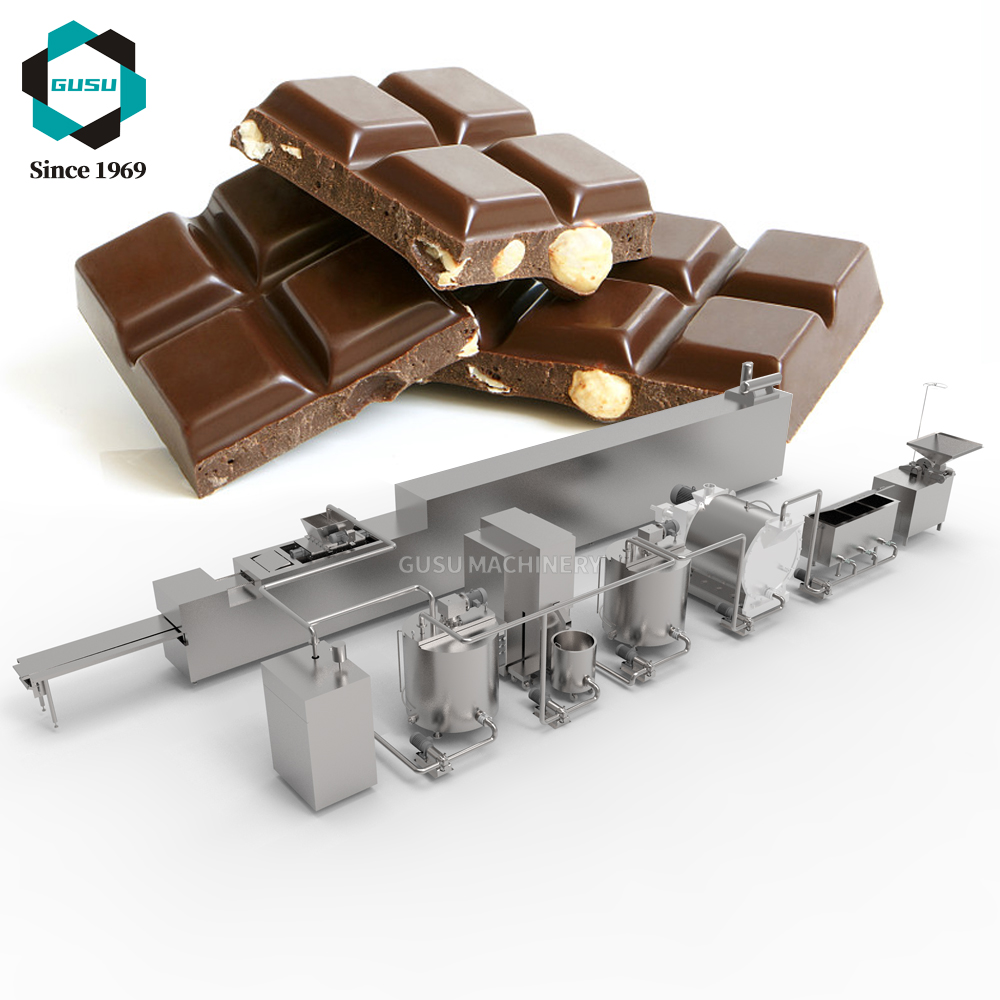
The brushed steel exterior and touchscreen controls might catch your eye, but they won't tell you much about how evenly heat moves through the chamber. What actually matters is hidden behind that outer skin: the fan placement, the shape of the ducting, and how the sensor reads the air rather than just the element.
Some machines run the fan constantly while others pulse it to avoid browning the tops too fast. The tempering side gets interesting when you look at how low-temperature air is folded back in — a small vent or a secondary element makes a real difference. If the mechanism is designed to hold a narrow band near 30°C, you'll notice it in the snap and shine of the final product, not in the spec sheet.
Ignore the demo mode and ask what the temperature swing actually is over ten minutes. Listen for a fan that ramps softly instead of kicking on like a hair dryer. Those are the details that separate a machine built around the tempering process from one that just wraps a generic heater in a nice-looking housing.
Why Frame Weight and Blade Design Change Your Daily Workflow
A frame that feels too heavy in your hand becomes something you quietly avoid. You might not notice it on day one, but by midweek the extra grams start shaping your choices, whether you reach for a different tool, shorten your session, or simply take more breaks than you planned. Weight is not just a spec on paper; it turns into fatigue that compounds across dozens of small cuts and lifts, slowly changing how long you stay comfortable and how steady your lines remain.
Blade design pushes that shift even further. A thicker spine or a taller profile changes the angle of your wrist and the way pressure travels through your fingers, so what felt natural with one knife may feel clumsy with another. Over time, your body adapts to the blade geometry rather than the task itself, which can lead to subtle re-gripping, overcorrecting, or losing the clean pivot points you rely on for repeatable work.
Together, frame weight and blade shape quietly rewrite your daily rhythm. A lighter setup with a blade that matches your natural grip keeps you in motion longer without the constant micro-adjustments. That is why the same task can feel effortless one week and draining the next, not because the material changed, but because the tool you picked in the morning changed how you moved through the whole day.
Build In Room for Molds, Inclusions, and Seasonal Experiments
Give the molds a room with a door that actually closes. Not because the rest of the space has to be sterile, but because good mold work depends on stable humidity and slow air movement, and both are hard to maintain when someone is constantly walking through. A small exhaust fan and a set of wire racks are usually enough to let surface blooms develop without taking over neighboring batches.
Inclusions need their own quieter zone nearby. Fruit, nuts, spice rubs, and syrups all introduce moisture and wild yeasts, so keeping that work close to the mold room but not inside it prevents cross-contamination while still making the workflow feel natural. A stainless table with a lip and a few deep bins will handle most of the mess.
Seasonal experiments tend to fail in interesting ways, so plan the room for easy resets. Adjustable shelving, movable dividers, and a floor drain make it much less painful to shift from winter root vegetable batches to summer fruit trials. If the space feels slightly unfinished, that is often a good sign: it means you left room to learn.
The Maintenance and Energy Costs Nobody Puts on the Spec Sheet
Most buyers will spend hours comparing frame size, output torque, and rated load, then sign off without asking how often the filters need changing or what the part-load efficiency actually looks like. That's where the quiet costs pile up. A drive that runs a little hotter than the datasheet suggests might not fail during the warranty period, but it shortens capacitor life and adds cooling load to the room. None of that shows up on the quote.
Energy tends to be treated as somebody else's problem because it isn't printed next to the price. In continuous operation, though, a three-point efficiency gap can wipe out the purchase discount within a couple of seasons. I once walked through a plant with two nearly identical pump skids; the cheaper unit drew enough extra current at 70 percent flow that the annual utility bill erased the upfront savings. Maintenance has the same blind spot. Grease points tucked behind a guard, seals you can only source from one supplier, and access panels that are just a bit too small turn routine service into longer callouts, and every extra hour is real money.
Before comparing equipment, pull the real duty cycle and local utility rate into the math. Ask for part-load curves instead of the headline number, and have somebody stand next to the unit to see whether a filter swap takes four minutes or forty. Those details rarely make it onto a cut sheet, but they decide whether a machine is cheap to own or merely cheap to buy.
Before You Buy, Run These Real-Production Scenarios With the Dealer
Ask the dealer to run your actual production files, not a canned demo. If you drill brass on a Friday, have them drill brass on a Friday. If your shop swaps between thin aluminum and stacked steel, put that exact sequence on the table. A machine that looks smooth during a polished walkthrough often shows its true behavior only when the spindle load, cycle times, and tool changes match the job you already have waiting back at the shop.
Bring a few parts that recently caused trouble—tight tolerances, chatter, odd chip evacuation—and let the process run long enough to expose heat buildup or drift. It is easy to be impressed by a single finished piece. What matters more is the third or fourth hour, the tool change after a heavy roughing pass, and whether the dimensional results stay repeatable without someone hovering over the override knob.
Push the support side during the same visit. Have the dealer show how a tooling question or an alarm gets resolved, not just how the machine cuts in perfect conditions. The best time to discover how responsive they are under real production pressure is before the purchase order is signed, not after the first midnight breakdown.
FAQ
Look beyond motor power. A machine that lets you adjust speed in fine increments, reach every corner for cleaning, and swap out small parts without calling a technician will save more time than a faster motor. Batch size flexibility often matters more than maximum capacity.
Yes, but not because of the display. Consistent temperature prevents sugar from seizing and lets cocoa butter crystallize the way you intend. Machines with rapid response heating and cooling keep the chocolate in the working range without overshooting, which is where most textural defects begin.
It can, if the drum design allows long residence times and the stone or roller pressure is adjustable. The compromise usually shows up in aeration and moisture release. For dark chocolate with high cocoa content a combined unit can work well, but for milk or high-fat recipes you may still want a separate conche.
Replacement stones, belts, and seals arrive sooner than expected, especially with daily use. Also consider power upgrades, ventilation, and the labor involved in cleaning between origin batches. Shipping heavy equipment and calibrating custom parts can easily add twelve to twenty percent to the initial price.
Ask about granite density, shaft runout, and whether the tension is spring-loaded or fixed. Runout under load creates uneven particle size and metallic wear. A heavier base that damps vibration will keep the grind stable overnight, so look at the frame as carefully as the motor.
Bring your own cocoa nibs and a recipe you know well. Run a full batch, not a sample size, and listen for pitch changes after four hours. Check how easily the cover, discharge valve, and stones come apart. If a vendor hesitates on a full-batch demo, that tells you more than a spec sheet.
When your recipe relies on an unusual particle size, viscosity, or inclusion shape, or when your space requires a non-standard layout. Custom is also justified if you need to integrate with existing cooling tunnels or molding lines. Otherwise, a well-chosen standard machine with adjustable parameters is often easier to service.
Conclusion
Buying a custom chocolate machine usually goes sideways when the wish list drives the decision instead of the daily batch sheet. Start with what actually moves through your kitchen on a normal week, not the holiday production you imagine in year three; an oversized tank just means longer warm-up, more chocolate held at temperature, and more surface area to clean. Then dig past the polished casing. Ask how the tempering unit holds its curve during a long molding session, because a machine that drifts after forty minutes will quietly ruin gloss and snap. Frame weight and blade design matter just as much as the touchscreen. A heavy, rigid frame keeps the screw and scraper aligned under load, and blades that are easy to remove turn a thirty-minute flavor change into a quick job instead of a sticky bottleneck.
Leave space for the work you are not doing yet. If you think you might add filled bars, nut inclusions, or seasonal specials, the machine should accept different mold formats and have enough clearance for thicker masses. Otherwise you will be renting time elsewhere before the next holiday rush. Also ask for a real number on power draw, water or air consumption, and the parts that wear out first. Dealers rarely volunteer that a pump rebuild costs as much as a used melanger. Before signing, make them run your actual chocolate, your molds, and your inclusion-heavy recipe on the floor model. Pay attention to how long changeover takes and what happens when a batch is interrupted. A machine that only performs well in a demo video will cost you far more than the price on the invoice.
Contact Us
Contact Person: Zhang Wei
Email: [email protected]
Tel/WhatsApp: 8618662577837
Website: https://www.chocomachinery.com